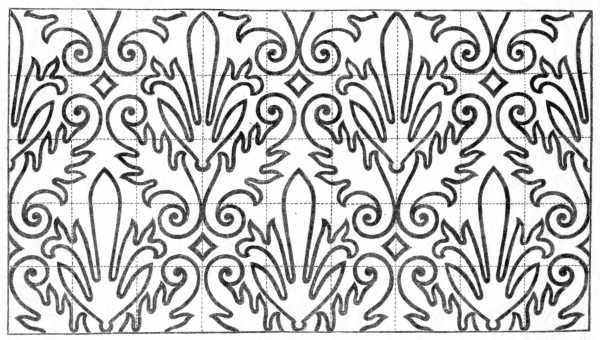
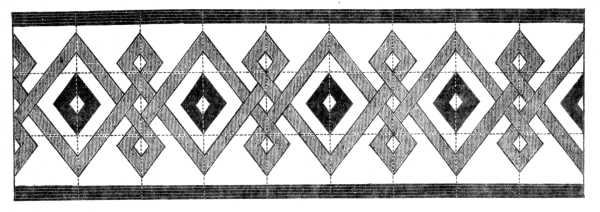
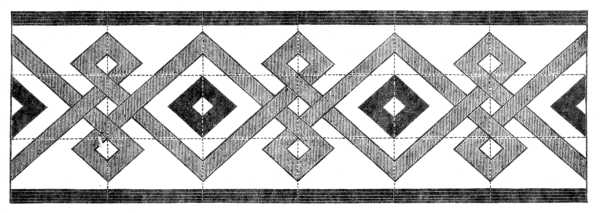
 Ornament after Holbein.
Ornament after Holbein.
Ornament after Holbein.
Hitherto we have been chiefly occupied with descriptions and explanations of the different kinds of needlework; to render these complete, it remains for us to give a few practical directions with regard to the copying, adjustment and transposition of the patterns, as well as to the different processes, often so essential to the ultimate success of a piece of needlework. For this success will soon be found not to depend on the stitches only but very largely on the proper adaptation of the design to the space it is intended to fill.
Then, in the case of new lace, it is necessary to know the amount of dressing it will require to give it the right stiffness and when this dressing has worn off how to renew it; whilst in the case of appliqué work more especially, it is indispensable to know exactly what the ingredients are, of which the paste should be composed and how to make and lay it on in the proper manner.
Tracing patterns against a window pane.—In order to copy a pattern in this way, the first step is to tack or pin the piece of stuff or paper on which the copy is to be made upon the pattern. In the case of a small pattern, the tacking or pinning may be dispensed with and the two sheets held firmly pressed against the window pane with the left hand, whilst the right hand does the tracing, but even then it is safer to pin or gum the four corners of the two sheets together, in case of interruption, as it is difficult to fit them together again exactly.
The tracing may be done with a pencil, or better still, with a brush dipped in Indian ink or water-colour paint.
The process of tracing is easy enough, so long as the hand does not get tired but as this generally comes to pass very soon it is best, if the pattern be a large and complicated one, to stick the sheets to the pane with strong gum or suspend them on a string, fastened across the pane by pins stuck into the window frame on either side.
To take off a pattern by rubbing.—If you want to take a pattern of a piece of embroidery direct from the work itself, lay it, the right side up, flat upon a board or table and cover it with letter or tissue paper.
The paper should be of a good medium thickness, if it be too thick it will not take a clear impression of the pattern, and if very thin it is apt to tear.
Fasten the paper down upon the embroidery with drawing-pins and rub off the pattern with drawing-wax. In default of the right kind of wax, the bowl or handle of a spoon, or a large silver coin will serve the purpose equally well, as will also some powdered graphite or charcoal. The outlines will not of course, in any case, be very clearly defined upon the paper and will have to be gone over and carefully supplemented afterwards with a pencil.
Taking off the pattern with charcoal or graphite is less injurious to the embroidery than rubbing it off with wax or metal, as the pressure required in the latter case flattens the needle-work very considerably. As soon as you have fixed the lines of the pattern by drawing them over with ink, it is ready for use.
To transfer a pattern direct on to the stuff.—Patterns cannot be copied by either of the above methods direct on to the stuff and can only be used when the stuff on which the embroidery is to be executed is transparent; in the case of thick close fabrics the drawing must be made on the stuff itself. The following is the simplest way of transferring a pattern on to a transparent stuff; begin by going over all the lines of the drawing with Indian ink so as to make them quite thick and distinct, and tacking the paper with large stitches on to the back of the stuff. Then, mix some very dark powdered indigo diluted with water, in a glass with a small pinch of sugar and powdered gum arabic, and using this as ink and a fine pen very slightly split, trace the pattern that shines through on the stuff.
The tracing must be very slight, for if the embroidery be not done till some time afterwards the lines get so firmly fixed in the stuff that one washing will not obliterate them; the tracing ink moreover makes the work unpleasantly sticky.
To copy with oiled paper.—Another rather expeditious mode of transferring patterns on to thin and more especially smooth glossy stuffs, is by means of a special kind of tinted paper, called autographic paper, which is impregnated with a coloured oily substance and is to be had at any stationer's shop. This you place between the pattern and the stuff, having previously fastened the stuff, perfectly straight by the line of the thread, to a board, with drawing-pins. When you have fitted the two papers likewise exactly together, you go over all the lines of the pattern with a blunt pencil, or with, what is better still, the point of a bone crochet needle or the edge of a folder. You must be careful not to press so heavily upon the pattern paper as to tear it; by the pressure exercised on the two sheets of paper, the oily substance of the blue paper discharges itself on to the stuff, so that when it is removed all the lines you have traced are imprinted upon the stuff.
This blue tracing paper is however only available for the reproduction of patterns on washing stuffs, as satin and all other silky textures are discoloured by it.
To pounce patterns upon stuffs.—The modes of copying, hitherto described, cannot be indiscriminately used for all kinds of stuff; for cloth, velvet and plush, for instance, they are not available and pouncing is the only way that answers.
The patterns, after having been transferred to straw or parchment paper, have to be pricked through. To do this you lay the paper upon cloth or felt and prick out all the lines of the drawing, making the holes, which should be clear and round, all exactly the same distance apart.
The closer and more complicated the pattern is, the finer and closer the holes should be. Every line of the outline must be carefully pricked out.
If the paper be sufficiently thin, several pouncings can be pricked at the same time, and a symmetrical design can be folded together into four and all pricked at once.
The pricked pattern has next to be tacked upon the material, the side from which the pricking was done next to the stuff and the little funnel-shaped holes uppermost. Paper and stuff must be firmly fastened down and kept in position by drawing pins, so that neither of them may move during the process, otherwise you will have double lines on the stuff which you will find very confusing afterwards.
For the pouncing, use either powdered chalk or charcoal, according to whether the stuff be dark or light in colour. Dip the pouncing implement, a thing like a small drum-stick, stuffed and covered with cloth, into the powder and rub it lightly over the whole surface of the pricked pattern, so that the powder penetrates through the pin-holes to the stuff. In default of a proper pouncing implement take a small stripe of cloth, roll it up round a stick and wind a string round, and dip this into the powder.
When the powder has penetrated to the stuff, remove the paper and if the pattern is to be repeated, lay it on again further on, taking care to make the lines meet exactly so that the join may not be seen.
When you have finished the pouncing and taken off the paper, you proceed to draw or rather paint in the pattern with water-colour paints: Ackermann's are the best for the purpose; no others, as far as our experience has proved, adhere so well to even the roughest fabrics or so little affect the brilliancy of the embroidery thread. Four paints, blue, black, yellow and white are sufficient for all purposes, whatever the colour of the stuff may be.
On a smooth surface the tracing may be done with a pen but a small sable-hair brush is preferable under all circumstances.
The rougher and more hairy the surface, the finer the brush ought to be, in order that the colour may sink well in between the fibres.
Before beginning to paint in the pattern, gently blow away all the superfluous powder from the surface. This process may be objected to as being an old one which has been superseded by new inventions; a resinous powder for instance, by the use of which patterns can be fixed, as soon as they have been pounced, by passing a hot iron over the stuff, a sheet of paper having first been laid upon it to protect it; or else a mixture of gum and powder which can be dissolved on the stuff itself by the steam of spirits-of-wine, and various other processes needless to mention here, as some are only useful in tracing patterns on a large scale, whilst others require a variety of appliances, not as a rule, within the reach of those to whom needle-work is a simple recreation.
The preparation of the stuffs and the subdivision of the patterns.—Long years of experience and practice have brought us in contact with a good many designers, many of them artists in their way, so long as it was only a question of putting their own compositions on paper but who yet found themselves confronted by real difficulties the moment they were called upon to transfer them to stuff.
We shall, as far as possible, point out to our readers the precautions to be taken in tracing patterns and must for that purpose go back to one of the first operations, namely that of pricking.
To begin with, the paper on which the pattern is should always be large enough for there to be a clear margin of from 4 to 5 c/m. all round the pattern, so that the pouncing instrument may never come in contact with the stuff beneath.
In transferring patterns to stuff, no lines of division should ever be made directly upon it either with lead, chalk or charcoal, as it is hardly ever possible entirely to obliterate them and they often become very confusing afterwards.
Before beginning the tracing, divide your stuff into four, then decide what the width of the border outside the pattern is to be; it is quite an exceptional thing to carry a pattern right up to the edge. Stuffs that will take a bend, such as all linen and cotton textures, can be folded in four, like the paper, the folds ought then to be pinched and pressed down so that the lines may remain clear and distinct until the tracing be finished.
After dividing it into four, mark out the diagonal lines; these are absolutely necessary in order to get the corner figures rightly placed.
Though most of our readers know how to make these lines on paper with a pencil and ruler, few, easy as it is, know how to make them upon stuff. You have only to fold over the corner of your piece of stuff so that the outside thread of the warp or cut edge run parallel with the woof edge which marks the angle of the fold-over.
This double folding over divides the ground into 8 parts. To arrange for the outside border or margin, is easy enough if the stuff and the kind of work you are going to do upon it admit of the drawing out of threads, as then a thread drawn out each way serves as a guide for tracing the pattern, straight to the line of the stuff. It is often better however, not to draw out the threads for an open-work border till the pattern be traced. If you do not wish or are not able to draw out threads to mark the pattern and you are working on a stuff of which the threads can be counted, follow the directions given on page 128, and explained in fig. 252.
You cannot mark cloth, silk stuffs or plush by folding them in the above way, cloth and some kinds of silken textures will not take a bend and others that will would be spoiled by it.
All such stuffs should be mounted in a frame, before the pattern be traced and the ground be then divided out in the following way: take a strong thread, make a knot at one end, stick a pin into it and tighten the knot round it; with a pair of compasses, divide one of the sides into two equal parts, stick the pin with the knot round it in at the middle and the same on the opposite side, putting in a second pin by means of which you stretch the thread; carry other threads across in a similar way, in the width of the stuff and from corner to corner and you will have your ground correctly marked out, in such a manner as to leave no marks when, after pouncing in the pattern, you remove the threads. Before finishing the pouncing of a pattern, see that it is the right size for the purpose it is intended for.
Supposing that you are tracing a border with a corner, you should measure the length it will occupy and then by a very light pouncing, you can mark the points from which the pattern will have to be repeated. It may be that a gap will be left in the middle, which, if not too large, can be got rid of without altering the pattern by pushing the whole thing a little further in and so shortening the distance between the two corners.
Should the gap however be too large for this, you will have to make a supplementary design to fill up the place. The same thing would be necessary in the case of your having to shorten a pattern.
To transpose and repeat patterns by means of looking-glasses (fig. 885).—We have referred to the necessity that often occurs of adapting patterns to certain given proportions; this can in most cases be done easily enough without the help of a draughtsman, especially in the case of cross stitch embroideries, by means of two unframed looking-glasses (Penelope mirrors, as they are called) used in the following manner.
If you want to utilize a piece only of a straight border, or after repeating it several times, to form a corner with it, you place the mirror in the first instance across it at right angles, at the place from which the pattern is to be repeated, and then exactly diagonally inwards.
To make a square out of a straight pattern, you take two mirrors and so place them that they touch at the point where the diagonal lines meet, as represented in fig. 885, and you have your square at once.
This is all easy enough, but before beginning any large piece of work it is necessary to consider carefully which parts of the drawing will best fill the centre and which are best suited to form the corners, as it is not every part of a straight pattern that is adapted for repetition.
A few preliminary trials with the help of the mirrors will better show the importance of these explanations than anything further we can say on the subject.
To alter the proportions of a pattern by dividing the ground into squares (figs. 886 and 887).—Cases will occur where it will be found necessary to subject the pattern to greater modifications still than those we have hitherto been dealing with.
You want, for example, to embroider a rather large running ground pattern on a piece of stuff, that is relatively too small for the subject; or a small and rather minute pattern on a large surface on which it is likely to look, either too insignificant, or too crowded and confused and the chances are, if you do not know how to draw, you will either think it necessary to get a draughtsman to help you or you will give up the piece of work altogether, deterred by the difficulties that confront you. You need not do either if you will follow the directions here given.
Take a sheet of large-sized quadrille paper which if necessary you can prepare for yourself; trace your pattern upon it, or rule the squares direct upon the drawing, as shown in fig. 886.
On a second sheet of vegetable paper, rule squares, a fourth, a third or half as small again as those on the first sheet. Thus, if the sides of the first squares be 15 m/m. long and you want to reduce your pattern by one fifth, the sides of your new squares should measure only 12 m/m.
If, on the contrary, you want to enlarge the pattern by one fifth, make the sides of your squares 18 m/m. long.
Then you follow, square by square, the lines of the drawing, extending or contracting them, according to whether the pattern is to be enlarged or diminished.
To copy a pattern directly from a piece of embroidery and enlarge or diminish it at the same time, proceed as follows: fix the embroidery on a board, stretching it equally in every direction; then measure the length of the drawing, divide the centimetres by the number of units corresponding to whatever the proportions of your copy are to be, and if there be any fractions of centimetres over, subdivide them into millimetres, if necessary, into half millimetres and make your division by whatever measure you have adopted; take a pair of compasses with dry points, open them sufficiently for the opening to correspond to the number and the distance obtained by the division; plant a pin with a thread fastened to it, at the point indicated by the point of the compasses and repeat the last operation all along one side of the embroidery and, if possible a little beyond it, so that it may not be defaced by the marks of the pins. All you now have to do is to pull the threads in perfectly straight lines to the opposite side and carry other threads across them in a similar manner so that the whole surface be divided into squares.
It is needless to say that if you have to trace a pattern from a mounted piece of work you cannot stretch it on a board; with a little invention however some way can always be found of planting the pins so as not to injure the work.
To alter the width of a pattern retaining the original height (figs. 888, 889, 890).—Sometimes it is necessary to lengthen out a pattern without however altering its height. In this case you modify the shape of the square and make long or narrow squares, according to the general shape of the design you wish to reproduce. Fig. 888 represents a pattern in Soutache D.M.C, marked out in squares; in fig. 889 the squares are lengthened out a third beyond their original size and the pattern is expanded; in fig. 890, the squares are compressed to a third less than their original size.
This method of subdividing patterns greatly facilitates the alterations they have so often to undergo and we are sure that there are few amongst those who have any real aptitude for needlework, who cannot draw enough to be able to copy the contents of a square.
To prepare the paste for appliqué work.—It may seem strange to devote a separate paragraph to such an apparently simple operation; but in appliqué work it is a most important one, as not only the stuff on which the work is done but all the expensive accessories are liable to be spoilt by paste that has been badly prepared.
Put some wheaten (not rice) starch into a vessel with a rounded bottom, pour on just enough water to dissolve the starch and stir it with a wooden spoon till it becomes perfectly smooth.
In the meantime put about ¼ of a pint of clean water on the fire to boil and when it boils add to it a little powdered pitch or carpenter's glue, in quantity about the size of a pea and pour in the starch, stirring it the whole time. When the mixture has boiled up several times take it off the fire and go on stirring it till it gets cold, otherwise lumps will form in it, which as we specially pointed out in the preceding chapter, must never be allowed to get in between the stuff and the paper.
This kind of paste makes no spots and does not injure even the most delicate colours as it contains no acid. In winter it will keep for several days, but in hot weather it very soon begins to ferment and should then on no account be used.
Gum arabic ought never to be used for appliqué work, as it becomes so hard that it is impossible to get the needle through, whilst the saccharine it contains almost always causes ugly spots to appear in the stuff when it dries.
When the work is finished it is a good plan to spread a very thin layer of paste over the entire back of it with a fine brush made of hog's bristles, and not to take it out of the frame until it is perfectly dry.
To stiffen new needlework.—In the chapter on Irish lace, page 441, we said that new needlework of that kind had to be ironed; this should be done in the following manner: when the lace has been taken off its foundation, lay it, face downwards, on a piece of fine white flannel; then dip a piece of very stiff new organdie muslin into water, take it out again almost immediately and wring it slightly, so that no drops may fall from it, and then dab the wrong side of the lace all over with this pad of damp muslin and iron it with a hot iron which should be moved slowly forwards so that the moisture which the organdie has imparted to the lace may evaporate slowly. Not until you are quite sure that the lace is dry should it be taken off the board.
There is no better way than this of giving new lace that almost imperceptible degree of stiffness by which alone it is often to be distinguished from old. Water only does not stiffen the thread sufficiently and it is difficult with starch to hit upon exactly the right consistency, whereas the organdie muslin supplies just the needful quantity.
Embroidered network can be stiffened in the same manner and should be damped in the frame on the wrong side and not taken off until it is quite dry.
We even recommend embroidery on linen being treated in the same way but when the linen is very creased, cover it with a damp cloth and iron upon that first, then take the cloth away and iron the embroidery itself so as to dry it completely.
To wash ordinary lace.—Wind it round a bottle the same width top and bottom and cover it entirely with muslin, fastened to the lace by a few stitches. Fill the bottle half full of sand, so that it may not get knocked about too violently when the water boils.
Immerse the bottle in a saucepan of cold water with a piece of soap the size of a nut in it, and if the lace be very dirty, a small pinch of salt, and let it boil for about an hour pouring off the water as it gets dirty and adding clean.
When all the dirt has been boiled out of the lace, which you will know to be the case when the water remains perfectly clear, rinse out the soap before you take the lace off the bottle, by plunging it into cold water.
To wash real lace.—The process is the same as the above, but as real lace is so seldom washed and is generally very yellow and fragile, particularly if it has been roughly used, it is rather difficult to clean.
If stained or greasy, it should be left to soak for some hours or even days, in good olive oil. This restores to the thread that softness and smoothness which use and bad washing had impaired. After the oil bath it should be washed on a bottle in the manner already described.
To stiffen lace.—Dip the lace when perfectly dry in thin starch prepared as follows.
Take as much fine wheaten starch, as you think you will require, divide it into two portions and dissolve both in cold water. Boil the one portion and when it has so far cooled as to have ceased to steam, stir the cold starch into it and dilute the whole with cold water to the consistency of thick cream. If the lace is to be slightly coloured, add a few drops of black coffee, or dilute the starch with weak tea or guimauve water; the coffee will give it a dark cream colour, either of the latter a pale greenish hue.
Dip the lace in the mixture and squeeze it out gently without wringing it to get rid of all the superfluous liquid, then lay it flat on the left hand and beat it for a few minutes with the right to work the starch well in; repeat the whole process twice, then roll the lace in fine linen and leave it there till you are ready to iron or pin it out, as the case may be.
To iron lace.—After the lace has lain for an hour or two in the cloth, iron it if it be machine-made and if it be Irish Guipure or real point lace of any sort, pin it out.
Before you begin to iron, hold the lace tight in your left hand by the footing and with the right hand pull out all the picots, along the edge of the lace, to an equal length, then lay it out flat upon a board covered with white flannel and iron it with a moderately hot iron, passing the iron backwards and forwards over it until it be quite dry.
If creases should come in the ironing where they ought not to be, dab them over lightly with a sponge moistened with water and a few drops of starch and pass the iron over them again.
After ironing the whole length of lace, pull it out crossways from left to right, and from right to left and iron it all over once more. This does away with the artificial stiffness and gives it the agreable softness and pliancy of new lace.
To pin out lace.—In order to pin out lace in a thoroughly satisfactory manner, you should provide yourself with a wooden drum, about 30 c/m. high and from 50 to 60 c/m. in diameter, large enough to rest upon the knees.
The outside circumference of the wood should be padded and covered with grey or white ticking.
The pins must be exactly the size of the picots they are to pin down; you will require extremely fine ones for Valenciennes and coarser for other kinds of lace: steel pins are of no use whatever, because of their liability to rust. Cover the cylinder with blue paper (less trying for the eyes than any other) and take only just as much lace out of the damp cloth as you are likely to be able to pin out before it gets dry, keeping the remainder covered up.
Lay the lace upon the drum and pin the footing down first in a straight line, sticking the pins in pretty closely and at regular distances apart; then pin down each picot separately, taking care not to open them if they have kept their original shape and to shut them up by twisting them if they have got untwisted.
If you find the pinning out troublesome and cannot get it all done before the lace dries, damp the picots with a sponge as you proceed.
Lace should never be pinned out when it is dry as the threads of the picots are then very apt to break and torn picots destroy the value of even the choicest lace.
Raised lace has to be stamped out from the wrong side with a lace awl or kind of pricker of bone made for the purpose. Some professional lace-cleaners use this implement even for Valenciennes lace but we cannot recommend it, seeing that it is a lace that is by nature perfectly flat.
Let the length of lace you have pinned out remain on the drum till it be quite dry; if you have several yards to pin out, wind it round and round the cylinder. Cover up the lace as you proceed and put each length away as soon as it is ready in a blue paper bag, so as to keep the whole perfectly clean.
In conclusion we may remark that the cleaning of lace should only be undertaken when you are fairly sure of not being interrupted, as more especially the pinning requires to be finished off as quickly as possible.
To wash coloured cottons and work done with the same.—In order to test the fastness of the dyes, untie the skeins and pour boiling water upon them, leave them to soak for about a quarter of an hour, soap and rub them lightly with the hand from end to end and rinse them out thoroughly in as many changes of cold water as may be found necessary, until the water remain perfectly colourless.
Squeeze out all the water you can and let them dry quickly without exposing them to the sun.
Coloured cottons are often washed in vinegar, because it is supposed to affect the colour less than water does. We have come to the conclusion after several trials that this is a delusion, for the good dyes keep their colour without the aid of vinegar and the bad ones wash out in spite of it.
The fast colours lose none of their beauty in the process nor does it affect the quality of the cotton; any excess of colouring matter which the fibres of the cotton may have absorbed in the process of dyeing is got rid of by this means.
If a piece of work has been done with unwashed cottons and the colours run in the first washing, you have only to rinse it out in several changes of tepid water to restore it to its original freshness and if you want to give it a yellowish tinge, it should be dipped it in weak tea or coffee.
Materials.—It was stated in the preface that our readers would find the choice of colours and material rendered comparatively easy to them by the notes affixed to the illustrations, but these notes, in spite of all the care bestowed upon them must still have remained very incomplete had it not been for the following tables which we were fortunately enabled to append to our work and which will help every one to choose their own materials without having them actually before them. The strokes that are affixed to each number indicate the exact size of the thread, so that to find out the number you want to buy you have but to lay your pattern thread, stretching it slightly, on the strokes, in succession, till you come to the one that matches it in size.
With regard to the colours, the names and shades of which have been classed in the second table with the greatest care, and of which our workers have no less than 460 to choose from [3], all those referred to in connection with our illustrations are quite fast dyes [4], save in a few instances in which we were forced to make an exception in favour of a doubtful colour to secure a harmonious effect.
A complete table of colours must of necessity include certain more or less staring shades, which though they may not be to every one's taste cannot on that account be left out.
We conclude our work with the well-meant and by no means useless recommendation to our readers, never to begin a piece of work of any considerable size without first making sure that the colours they intend to use are fast and providing themselves with a larger supply of materials than even on a close calculation they think they are likely to require, lest they should find themselves under the disagreable necessity of having either to leave their work unfinished or finish it with materials that do not match. There is generally a slight difference in tone between cottons that have been bought at different times, and there is also a reasonable likelihood, considering their great variety, of some mistake being made in the number by either buyer or seller in ordering a fresh supply.
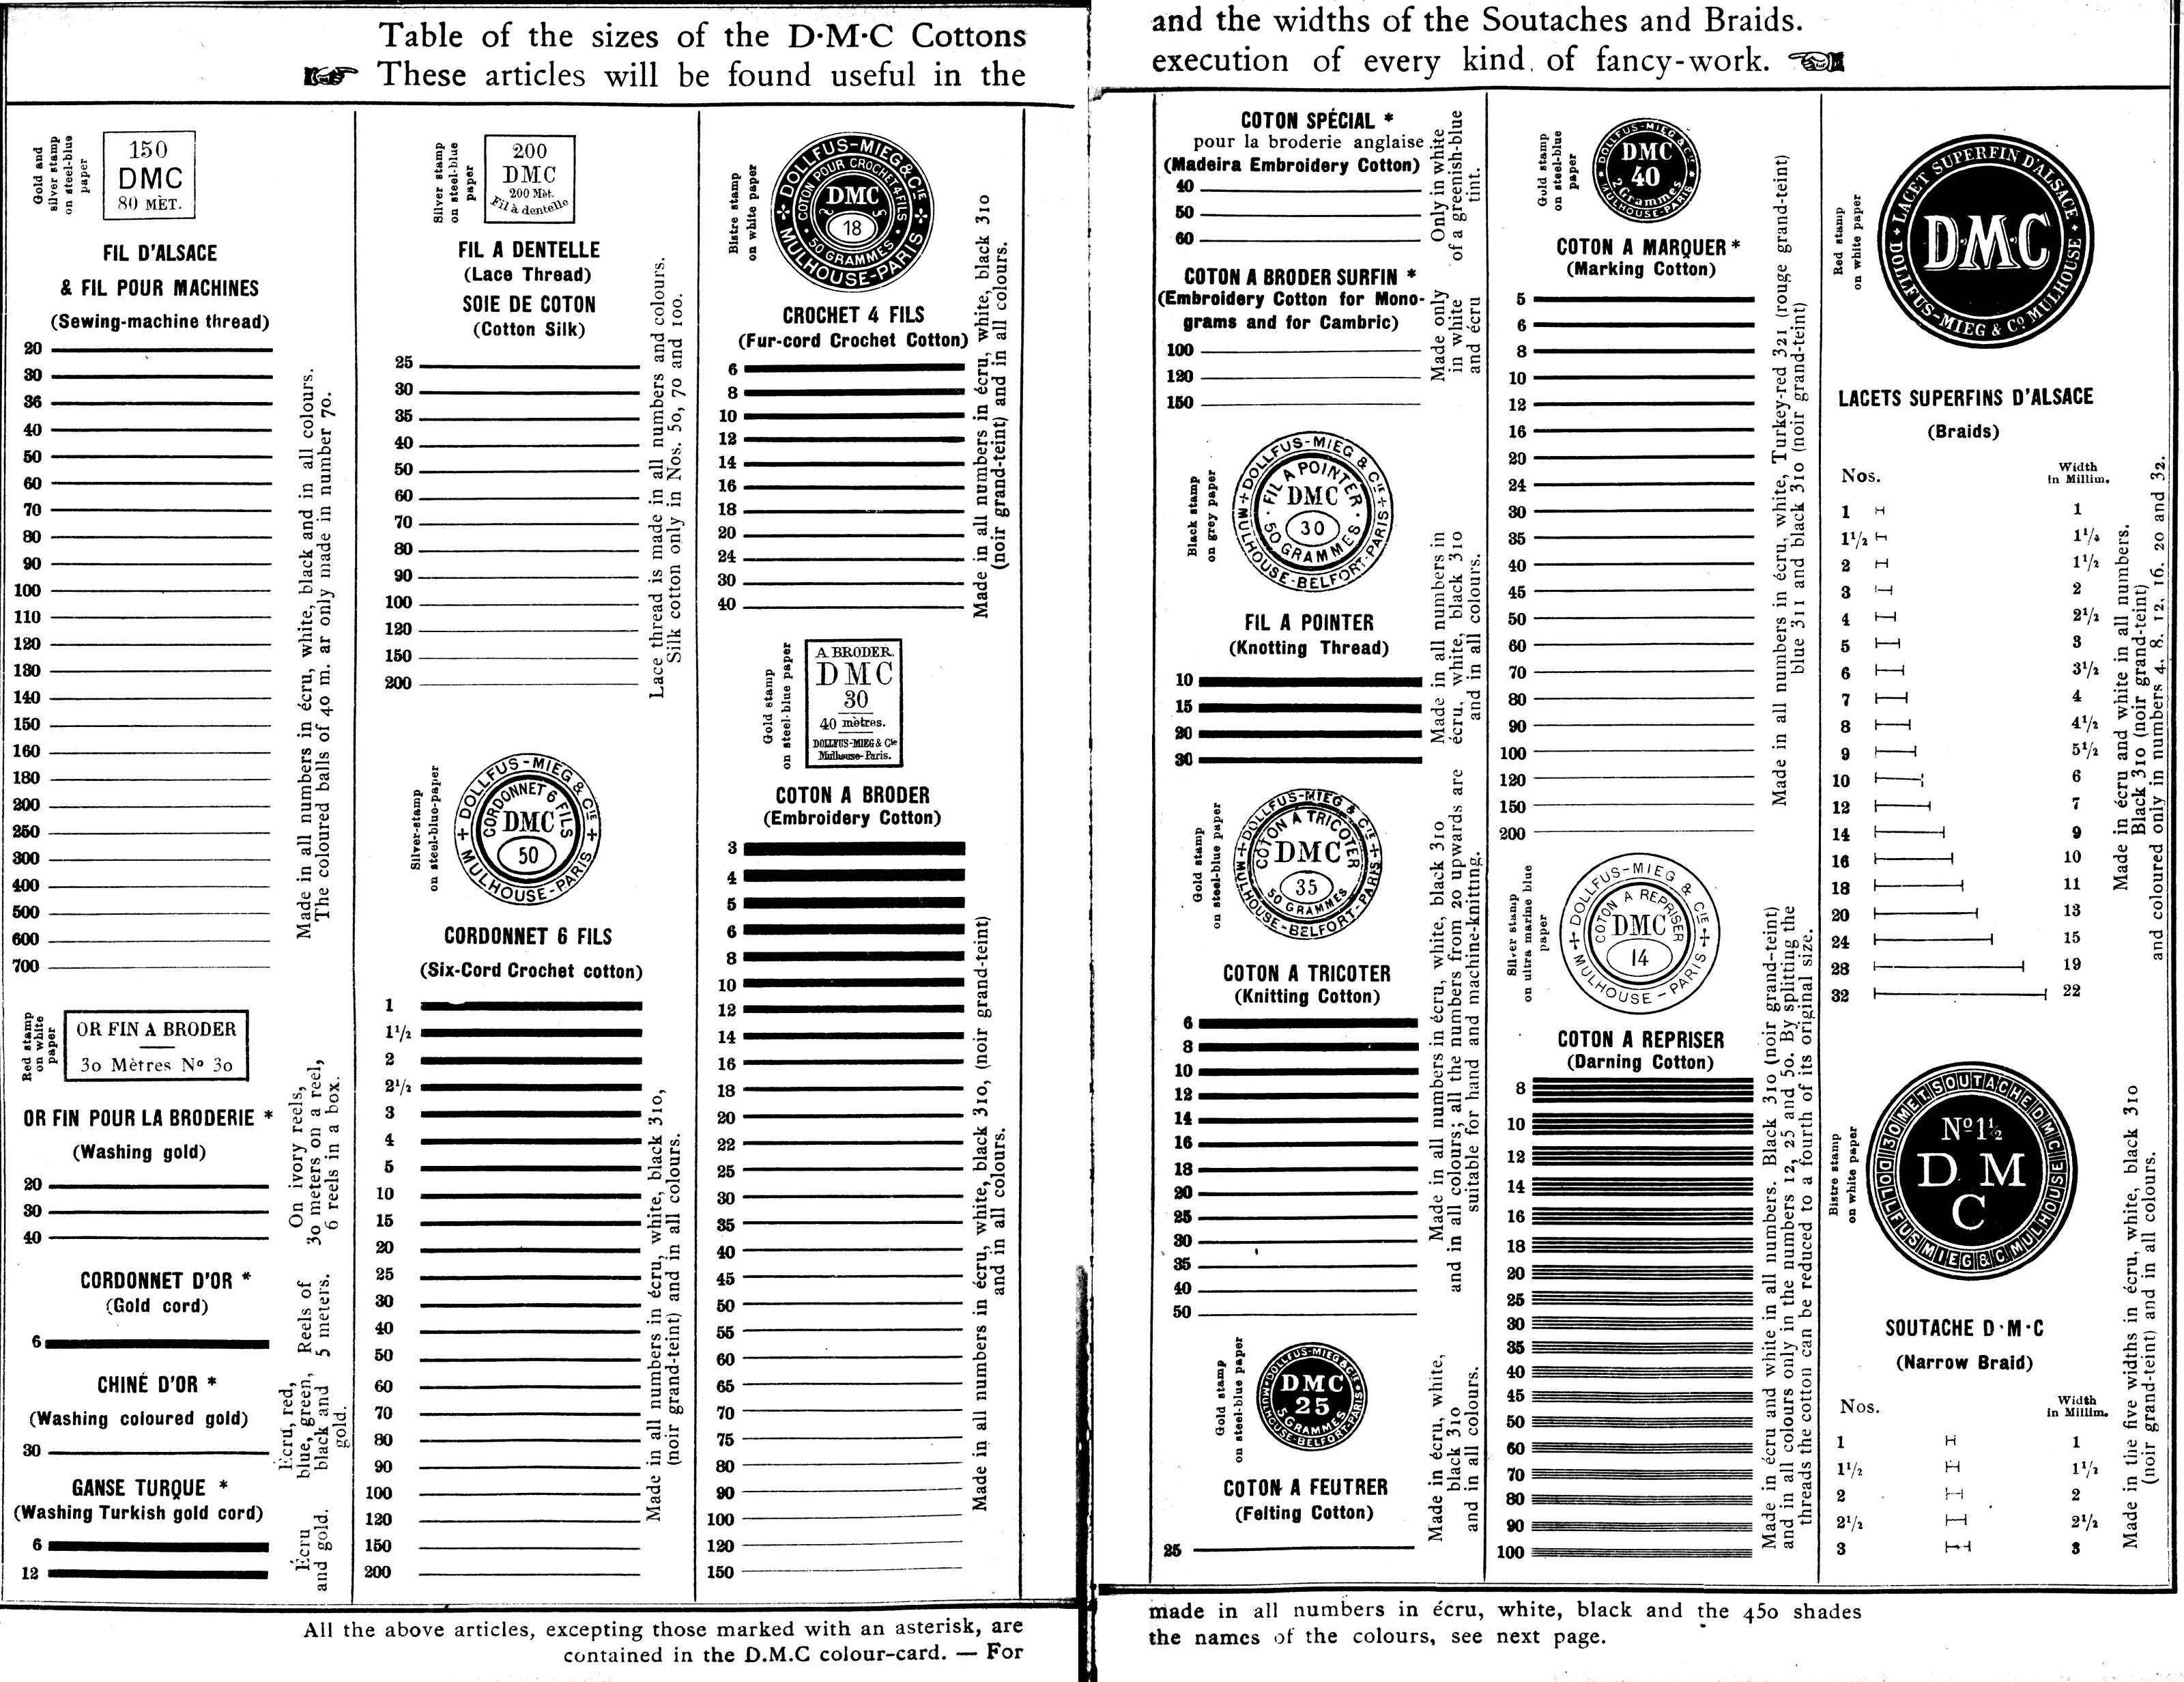 All of the above articles, excepting those marked with an asterisk,
are made in all numbers in écru, white, black and the 450 shades contained in the D.M.C colour card.--For the names of the colours, see next page.
All of the above articles, excepting those marked with an asterisk,
are made in all numbers in écru, white, black and the 450 shades contained in the D.M.C colour card.--For the names of the colours, see next page.
| Alphabetical list of the names and the numbers of the 450 shades D.M.C Alsace Thread, Sewing and Embroidery Cottons, contained in the D.M.C colour-card, in any of which shades the knitting Cotton, Soutaches and Braids etc. are to be had. | |||||
| Couleurs Colours | Très-foncé Very dark | Foncé Dark | Moyen Medium | Clair Light | Très-clair Very light |
| Bleu d'Azur | ... | 3325 | ... | ... | ... |
| Bleu-Canard | 3395 | 3306 | 3307 | 3308 | 3309 |
| Bleu cendré | ... | ... | 448 | ... | ... |
| Bleu de Ciel | 515 | 516 | 517 | 518 | 519 |
| Bleu-Fayence | 481 | 482 | 483 | 484 | 485 |
| Bleu de France | 337 | 338 | 339 | 340 | 341 |
| Bleu-Gentiane | 476 | 477 | 478 | 479 | 480 |
| Bleu-Gris | 3300 | 3301 | 3302 | 3303 | 3304 |
| Bleu-Indigo | 336 | 311 | 312 | 322 | 334 |
| Bleu-Lapis | 342 | 333 | 343 | 344 | 345 |
| Bleu-Marin | 505 | 506 | 507 | 508 | 509 |
| Bleu-Outremer | ... | 682 | 683 | ... | ... |
| Bleu pâle | ... | ... | ... | 668 | ... |
| Bleu-Prunelle | 486 | 487 | 488 | 489 | 490 |
| Bleu tendre | ... | ... | ... | ... | 709 |
| Bleu vert | 525 | 526 | 527 | 528 | 529 |
| Bleu violacé | ... | 674 | 675 | ... | ... |
| —— | |||||
| Bronze doré | 585 | 586 | 587 | 588 | 589 |
| —— | |||||
| Brun-Acajou | 300 | 400 | 301 | 401 | 402 |
| Brun-Cachou | 433 | 434 | 435 | 436 | 437 |
| Brun-Cannelle | 660 | 661 | 662 | 663 | 664 |
| Brun-Caroubier | 354 | 355 | 303 | 356 | 357 |
| Brun-Chamois | 416 | 417 | 324 | 418 | 419 |
| Brun-Cuir | 430 | 431 | 302 | 432 | 325 |
| Brun-Feuille-morte | 615 | 616 | 617 | 618 | 619 |
| Brun-Havane | 454 | 455 | 456 | 457 | 458 |
| Brun-Loutre | 438 | 439 | 440 | 441 | 442 |
| Brun-Marron | 403 | 404 | 405 | 406 | 407 |
| Brun-Myrthe | ... | ... | 463 | ... | ... |
| Brun-Puce | 459 | ... | ... | ... | ... |
| Brun-Rouille | 3310 | 3311 | 3312 | 3313 | 3314 |
| —— | |||||
| Gris-Acier | 650 | 651 | 652 | 653 | 654 |
| Gris-Amadou | 329 | 383 | 384 | 385 | 386 |
| Gris d'Argent | ... | ... | 719 | ... | ... |
| Gris-Bleu | 590 | 591 | 592 | 593 | 594 |
| Gris-Bois | 610 | 611 | 612 | 613 | 614 |
| Gris-Brun | 408 | 409 | 410 | 411 | 412 |
| Gris-Castor | 645 | 646 | 647 | 648 | 649 |
| Gris-Cendre | 413 | 317 | 414 | 318 | 415 |
| Gris-Coutil | 387 | 388 | 323 | 389 | 390 |
| Gris-Deuil | 655 | 656 | 657 | 658 | 659 |
| Gris-Écru | ... | 704 | 705 | 706 | ... |
| Gris-Etoupe | ... | 707 | 708 | ... | ... |
| Gris de Fer | 600 | 601 | 602 | 603 | 604 |
| Gris-Feutre | 635 | 636 | 637 | 638 | 639 |
| Gris-Ficelle | ... | 460 | 461 | 462 | ... |
| Gris-Foin | 520 | 521 | 522 | 523 | 524 |
| Gris-Fumée | 640 | 641 | 642 | 643 | 644 |
| Gris-Lin | ... | ... | 716 | 717 | ... |
| Gris-Mastic | ... | ... | 718 | ... | ... |
| Gris neutre | 620 | 621 | 622 | 623 | 624 |
| Gris-Noisette | 420 | 421 | 422 | 423 | 424 |
| Gris-Perle | 625 | 626 | 627 | 628 | 629 |
| Gris de Plomb | 378 | 379 | 380 | 381 | 382 |
| Gris-Poussière | 630 | 631 | 632 | 633 | 634 |
| Gris-Souris | 425 | 426 | 427 | 428 | 429 |
| Gris-Tilleul | 391 | 392 | 393 | 330 | 331 |
| Gris verdâtre | 595 | 596 | 597 | 598 | 599 |
| —— | |||||
| Jaune-Citron | ... | 307 | 445 | 446 | ... |
| Jaune-Crême | ... | ... | 711 | 712 | ... |
| Jaune-Maïs | 575 | 576 | 577 | 678 | 579 |
| Jaune d'Ocre | ... | ... | 676 | 677 | ... |
| Jaune-Orange | ... | ... | 443 | 444 | ... |
| Jaune-Rouille | 363 | 364 | 308 | 365 | 366 |
| Jaune d'Or | ... | ... | 667 | ... | ... |
| Jaune-vieil-Or | 678 | 679 | 680 | ... | ... |
| —— | |||||
| Lilas gris | 313 | 398 | 314 | 328 | 399 |
| —— | |||||
| Noir grand-teint | 310 | ... | ... | ... | ... |
| Noir-Jais | 681 | ... | ... | ... | ... |
| Noir vert | 473 | ... | ... | ... | ... |
| —— | |||||
| Rose-Eglantine | 570 | 571 | 572 | 573 | 574 |
| Rose tendre | ... | ... | ... | ... | 3326 |
| Rose vif | 565 | 566 | 567 | 568 | 569 |
| —— | |||||
| Rouge-Aurore | 360 | 306 | 361 | 332 | 362 |
| Rouge-Bordeaux | 496 | 497 | ... | ... | ... |
| Rouge-Cardinal | 346 | 347 | 304 | 305 | 348 |
| Rouge-Cerise | 3315 | 3316 | 3317 | 3318 | 3319 |
| Rouge-Corinthe | ... | ... | 447 | ... | ... |
| Rouge-Cornouille | ... | 449 | 450 | ... | ... |
| Rouge-Ecarlate | ... | 498 | 464 | ... | ... |
| Rouge-Framboise | 684 | 685 | 686 | 687 | 688 |
| Rouge-Géranium | 349 | 350 | 351 | 352 | 353 |
| Rouge-Grenat | 358 | 359 | 326 | 309 | 335 |
| Rouge-Groseille | 605 | 606 | 607 | 608 | 609 |
| Rouge-Maroquin | ... | ... | 3327 | 3328 | 3329 |
| Rouge-Turc | ... | ... | 321 | ... | ... |
| Rouge-Vermillon | ... | ... | 666 | ... | ... |
| —— | |||||
| Vert-Bouteille | 491 | 492 | 493 | 494 | 495 |
| Vert-Bronze | 669 | 670 | 671 | 672 | 673 |
| Vert-Canard | 545 | 546 | 547 | 548 | 549 |
| Vert-Corbeau | 665 | ... | ... | ... | ... |
| Vert doré | 580 | 581 | 582 | 583 | 584 |
| Vert d'Eau | ... | ... | 713 | 714 | 715 |
| Vert-de-gris | ... | 474 | 475 | ... | ... |
| Vert-Emeraude | 555 | 556 | 557 | 558 | 559 |
| Vert-Fauve | 689 | 690 | 691 | 692 | 693 |
| Vert-Lierre | 500 | 501 | 502 | 503 | 504 |
| Vert-Madeira | ... | ... | ... | 710 | ... |
| Vert-Malachite | 560 | 561 | 562 | 563 | 564 |
| Vert métallique | 465 | 466 | 467 | ... | ... |
| Vert-Mousse | 468 | 469 | 470 | 471 | 472 |
| Vert-Myrthe | 535 | 536 | 537 | 538 | 539 |
| Vert-Olive | 510 | 511 | 512 | 513 | 514 |
| Vert-Perroquet | 694 | 695 | 696 | 697 | 698 |
| Vert-Pistache | 319 | 367 | 320 | 368 | 369 |
| Vert-Pré | 699 | 700 | 701 | 702 | 703 |
| Vert russe | ... | 499 | ... | ... | ... |
| —— | |||||
| Violet-Améthyste | 3320 | 3321 | 3322 | 3323 | 3324 |
| Violet-Evêque | 451 | 452 | 453 | ... | ... |
| Violet-Lie-de-vin | 370 | 371 | 372 | 373 | 374 |
| Violet-Mauve | 375 | 315 | 376 | 316 | 377 |
| Violet-de-Parme | 540 | 541 | 542 | 543 | 544 |
| Violet-Pensée | 530 | 531 | 532 | 533 | 534 |
| Violet-Prune | 550 | 551 | 552 | 553 | 554 |
| Violet-Scabieuse | 394 | 327 | 395 | 396 | 397 |
| Couleurs Colours | Très-foncé Very dark | Foncé Dark | Moyen Medium | Clair Light | Très-clair Very light |
To avoid mistakes the public is urgently requested to designate the colours by the number, never by name.
The colours whose numbers begin with 3 or 4 are the fastest.
Further information respecting mode of execution, materials and so forth may be had by applying to the firm of
TH. de DILLMONT, DORNACH (Alsace).
[3] The D.M.C colour-card consists of 450 shades about half of which are fast dyes. See the list of names on pp. 572 and 573.
[4] By fast (bon-teint) colours are meant those which will bear ordinary and repeated washing. There are only very few which are really fast, or grand-teint, that is to say, which will resist the action of chemical agents, amongst of these, the black, Noir 310, is quite indestructible.