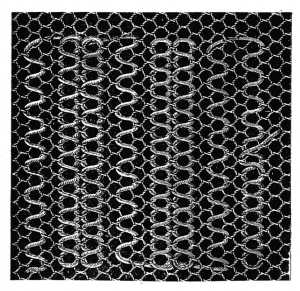
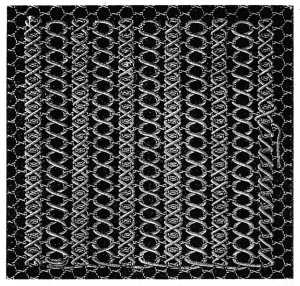
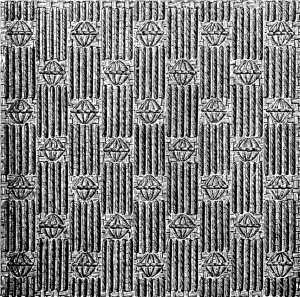
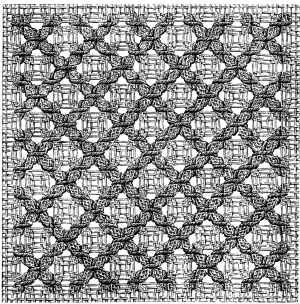
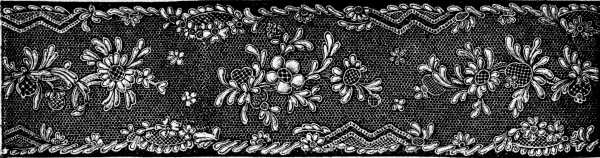
 Net stripe, in imitation of brussels lace.
Net stripe, in imitation of brussels lace.
Net stripe, in imitation of brussels lace.
Many net embroidery patterns and damask stitches consist of a combination of ordinary running and darning, others of chain, stem and cross stitch.
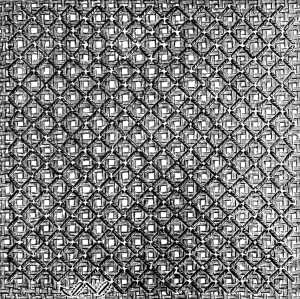
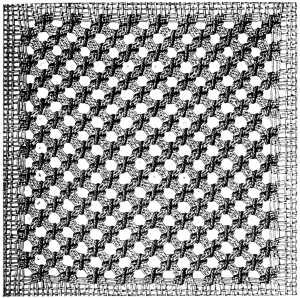
Net embroidery.—All these kinds of stitches can be worked on the coarse Greek net, as it is called, as well as on the finest quality of real Brussels net.
Stripes of net, finished off with button-hole edging, and ornamented with one or other of the following patterns, make very pretty washing laces and the like; net laid upon Irish point and converted by needlework into a lace ground, makes an excellent substitute for a hand-made ground, which demands much labour and time.
Materials suitable for net embroidery.—The choice of material must be determined by the quality of the net and the effect to be produced. For a coarse make of net and a very marked pattern, the lowest numbers of D.M.C cottons, or the narrowest braids, such as Soutache D.M.C Nos. 1, 2, 3 should be used; if the net be fine and the pattern a delicate one, then the higher numbers of the following are preferable: Coton à tricoter D.M.C Nos. 8 to 20, Coton à repriser D.M.C Nos. 25 to 70, Coton à broder D.M.C Nos. 16 to 50, Fil à dentelle D.M.C Nos. 25 to 50, Coton à broder surfin D.M.C Nos. 100, 120, 150. The latter must be adjusted to the required size before being used, that is to say as many strands of it removed, as is necessary in order to reduce it to the proper thickness.
Tracing with running stitches (fig. 113).—Have your pattern traced on linen or paper; tack the net upon it, and copy it carefully on the net with running stitches. As in darning, the stitches must run first above and then beneath, alternating in each succeeding row. At the turn of the lines, the stitches cross each other, as shown in the illustration.
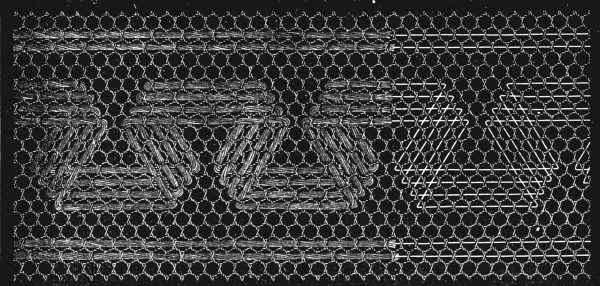 Fig. 113. Tracing with running stitches.
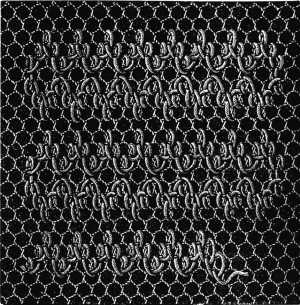
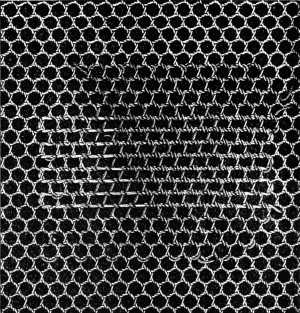
Net pattern (fig. 114).—Here too the pattern is traced with running stitches, which are run in on both sides of each row of meshes. The thread is carried first to the right, and then to the left, under every alternate bar of the net and out again. Between the first and second rows, one thread of the foundation must be left uncovered. In the next row, the thread is carried back again, so that it encircles each mesh. In the third row, the thread passes under the same bar of net as in the second, the threads touching each other. The fourth row is a repetition of the first.
Net pattern (fig. 115).—This consists of two rows of stitches. In the first, the single stitches run diagonally from left to right, over and under a mesh; in the second row the triple stitches, also carried diagonally across a mesh, lie from right to left.
Net pattern (fig. 116).—Begin with a double row, as in fig. 114; this is followed by a row of cross-stitch, touching the others, for which the thread has to be carried, first under one of the straight bars of the mesh and then diagonally, across it. A second, similar row of stitches backwards, completes the crosses. This can be further varied by the introduction of a row of triple stitches, after the double row, as in fig. 115, and the repetition of the two first only.
These rows can also be worked in two colours, or in white thread and washing gold.
Net pattern (fig. 117).—Begin at the top, carrying the thread, first under and then over two bars and a mesh, and then underneath as before. In the second as in the first row, the threads must be drawn in, so that 4 threads always meet in one mesh, and two run parallel to each other through the same mesh.
Net pattern (fig. 118).—This pattern, which resembles fig. 117 in the execution, is thickened by triple stitches. Above, where in the preceding row three threads were laid, the thread should be single.
Very pretty varieties are to be obtained by the introduction of several colours. Take white, for instance, for the first row, and different shades of the same colour for the second, third, fourth and fifth rows; such as, Bleu-Lapis 345, 344, 343, 333, 342,[A] or Rouge-Cardinal 348, 305, 304, 347, 346,[A] or Rouge-Géranium, Brun-Caroubier or any other colour that is absolutely fast.
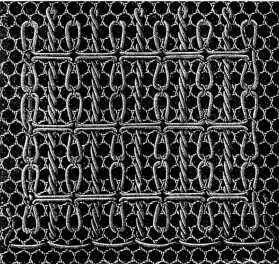
Net pattern (fig. 119).—After one row of cross-stitch, such as was described in fig. 116, add a second, carrying the thread under the bar that lies between the first stitches, so that the two rows only cover three threads of the net. The close bands of cross-stitch must be divided from each other by one row of net bars.
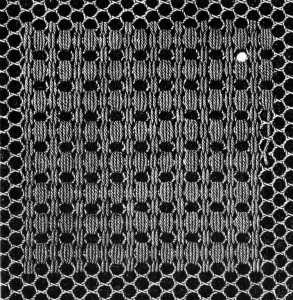
Net pattern (fig. 120).—Draw the thread twice backwards and forwards, as in darning, through one row of meshes. In the next, make four stitches over one mesh and two bars. After the fourth stitch, the thread is carried forward under two bars to the next group. The meshes filled in thus are divided from each other by two double rows of darning stitches. Here you may introduce a variety in the colour, using either white and unbleached, or unbleached and pale blue, or some other combination of the kind.
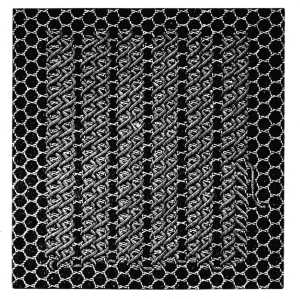
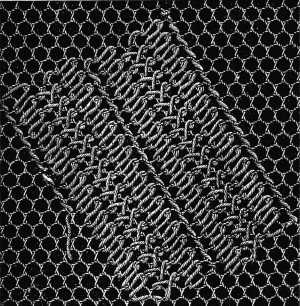
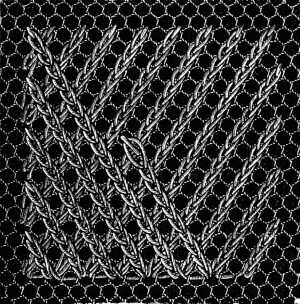
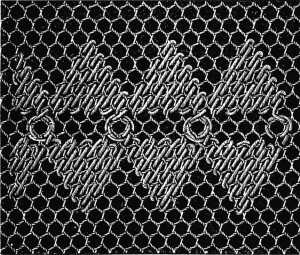
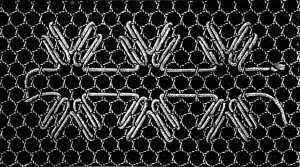
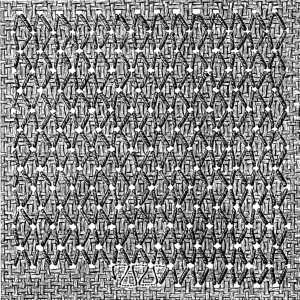
Net pattern (fig. 121).—Make three diagonal stitches over three bars and two meshes, then returning to the mesh out of which the first stitches come, make three more in the opposite direction. In the second row, the stitches meet in the same mesh as those of the first.
Net pattern (fig. 122).—Carry the thread upwards from below, over a bar of the net, then pass it horizontally under another bar and carrying it downwards, pass it under a diagonal bar and cover the other three. In the second row, your loops must be turned the opposite way. When the whole foundation is finished, run a thread over the whole surface and overcast it. A good effect is produced by using white and unbleached cottons, in alternate rows.
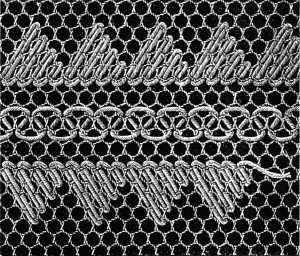
Net pattern (fig. 123).—This pattern consists of one row of overcasting, one of stitches like those described in fig. 114, and one of cross-stitch, as in fig. 39, running diagonally across the stuff. Besides the cottons already mentioned, washing gold thread (Or fin D.M.C pour la broderie), may be used for the overcasting. Dead gold introduced into simple needlework of this kind enlivens it extremely.
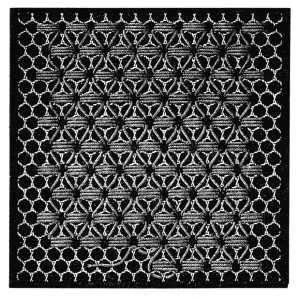
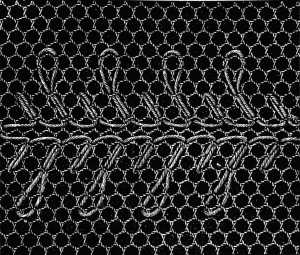
Net pattern (fig. 124).—Three kinds of stitches are required for this pattern. In the first row the stitch lies crossed underneath the net; in the second, 3 stitches are made over one mesh, the first and the last of which are carried across three meshes. In the third row, button-hole stitches are carried from right to left over two diagonal bars, in such a manner that the thread is drawn through the mesh facing the loops, and the next stitch comes out under the loop of the preceding one.
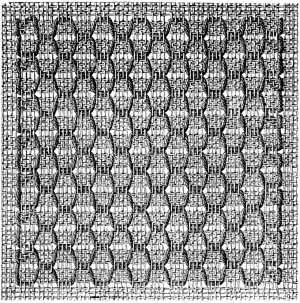
Net pattern (fig. 125).—Fill in every other diagonal row of meshes with chain stitch, inserting the needle into the same mesh it came out of, so that the thread lies in front of the needle, in a loop. The rows of chain stitch may be made with two or three rows of meshes between them. Even the diagonal lines by themselves, make a very pretty foundation for other stitches.
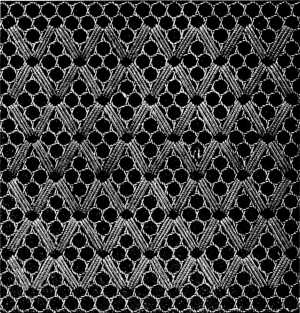
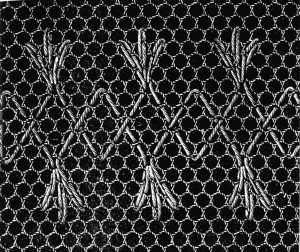
Net pattern (fig. 126).—The first row worked from left to right, consists of three loop stitches upwards and three downwards, each over one bar. In the second row, divided from the first by one row of stitches, the inner loops must be turned towards each other; in the third, the outer ones. Any of the stitches, already described, can be introduced into this pattern to enliven it.
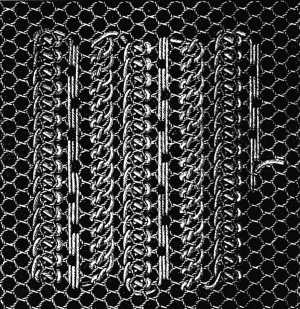
Net insertions (figs. 127 and 128).—These two, as well as the subsequent patterns, are most of them worked in darning stitch and simple overcasting.
The scallops in fig. 127 are formed of darning stitches, over 4, 3, 2 and 1 mesh, respectively. In the intervening space, which is five meshes wide, the stitch shown in fig. 118, may be introduced.
In repeating the pattern, the stitches forming the scallops, must be made to run in the opposite direction. Instead of the thread, simply drawn through the middle, little stars like those described in fig. 134, have a very pretty effect.
In fig. 128, the thread is first carried round one mesh and then on to the next scallop. In the second scallop, which turns the opposite way, the thread is carried once more round the last mesh after the pyramid is completed, and then on, to the next figure.
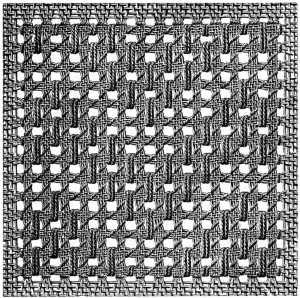
Net pattern (fig. 129).—This checked pattern is also worked in darning stitch. Carry the thread, as in fig. 125, through every second row of meshes. When the bottom rows are all finished, the upper ones are worked across them in the same way. Here the stitches may, if preferred, be distributed more sparingly. But if they are set wider apart, the spaces between should be filled up in some way. Little dots, made of Coton à repriser D.M.C, will answer the purpose best.
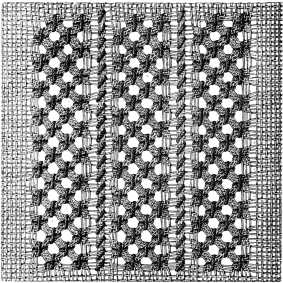
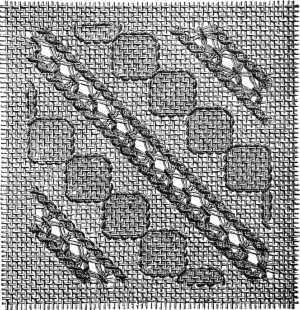
Net insertions (figs. 130, 131, 132).—These three patterns are specially suitable, for insertions, neck-tie lappets and the like, in the place of crochet, pillow, and other kinds of lace. Both design and stitch are clearly enough represented in the subjoined figure for further explanation to be unnecessary. All three should be worked with rather coarse cotton, and Soutache D.M.C[A] (braid) drawn in, produces an excellent effect.
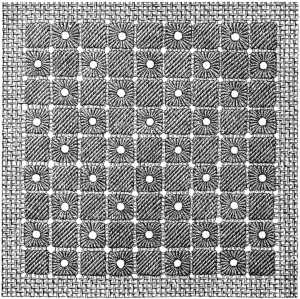
Net pattern (fig. 133).—These delicate little figures can be worked into a close pattern, or can be strewn singly over the surface. The closer you set the stitches, the more clear and distinct the stars will be. The thread must be drawn in to the centre mesh from without, so as to be invisible if possible, and then back again to the outside when the stitches are finished.
Net pattern (fig. 134).—These flowerets have a very pretty effect, set either singly, or in double or triple rows, and are very useful for filling up gaps or supplementing rows.
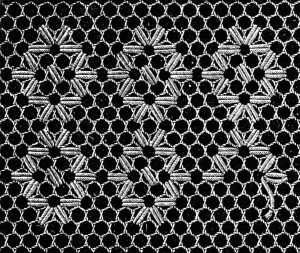
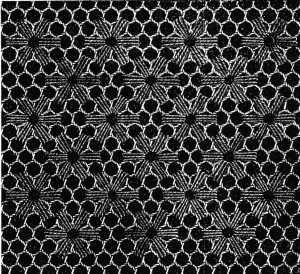
Net pattern (fig. 135).—These star-shaped figures, their longest stitch covering three straight bars and two meshes, the shortest, three diagonal bars and two meshes, may like the above flowerets, be ranged closely together in rows, so that four stitches, two horizontal and two vertical ones, meet in one mesh. Cotton of two colours should be used, in order that the figures may be distinct from each other: white and unbleached are the best, in cases where bright colours would be unsuitable.
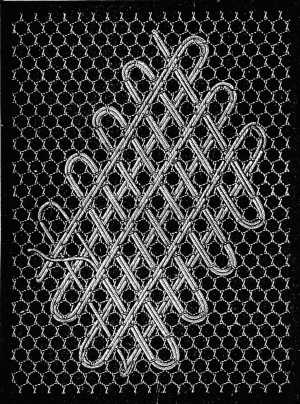
Net insertion (fig. 136).—These diamonds make a very pretty grounding either set separately, or in a continuous pattern. The design is slight, nevertheless, when it is worked in coarse cotton, the effect is exceedingly handsome, especially if the inside, in addition to the star here given, be enriched with ordinary darning-stitches, worked in fine gold thread, as we have already mentioned.
Net tracery with border (fig. 137).—In order to bring out the pattern and the colours, use instead of cotton, Soutache D.M.C, or Lacets surfins D.M.C. Both are to be had in all the colours, given in the list of colours of the D.M.C threads and cottons. The little border can be used in conjunction with any of the preceding patterns, but care must be taken not to let it get twisted in the working. To prevent this, slip a coarse needle under the last stitch, and draw the braid flat over it.
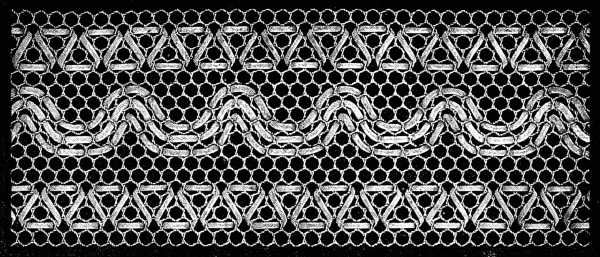 Fig. 137. Net tracery with braids.
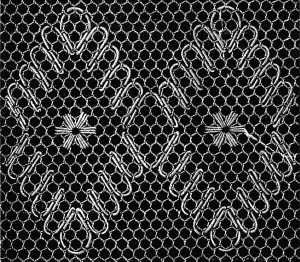
Broad net lace tracery (fig. 138).—The pattern of this pretty lace must first be transferred to stout paper, or oil-cloth. All the leaves and stalks, and the buttonholing round the open centres of the flowers, are worked in a pale green, the two bottom flowers in Turkey red, the star-shaped one in blue, the calyx in which the stalks unite, in dark red, and the little bells, in the lightest green.
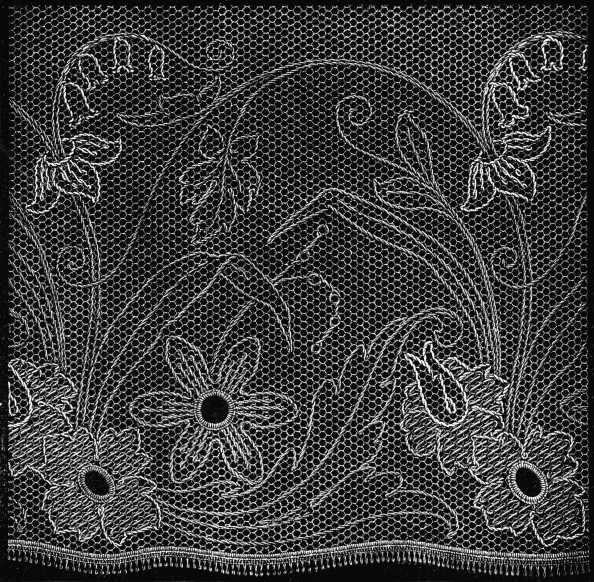 Fig. 138. Broad net lace tracery.
Net darning.—We conclude with some directions for darning net, a valuable art, by means of which many a curious piece of old needlework is preserved. Coarse and fine net are all darned in the same way.
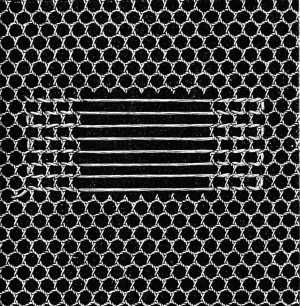
Laying the first thread (fig. 139).—Tack the net which is to be darned, closely to the defective part, upon either oil-cloth or coloured paper and cut the edges straight to the thread; Your thread must be of exactly the same size, as that of which the net is made. It takes three rows of stitches to imitate the net ground; in the first place, as shown in fig. 139, cross-threads must be laid from side to side, carried as in darning, a little beyond the edges of the hole and so as to surround each mesh with a slanting stitch.
Laying the second thread (fig. 140).—Secondly, beginning from one corner, threads are laid diagonally across the first layer. The cross-threads of the foundation are encircled by a stitch, made from right to left, the needle is then carried under the next horizontal bar, and the first layer of threads is overcast with similar stitches.
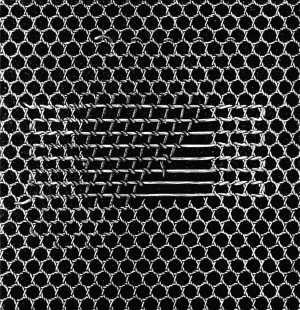
Laying the third thread (fig. 141).—Thirdly, threads are carried across the second and first layers. They must start, far enough from the edge, for the second layer of threads to be overcast at the same time, so that there may be no loose threads left on the wrong side. In this third journey, every diagonal thread of the foundation is to be encircled with a stitch, taken upwards from below, the cut edges being strengthened in the same way. Then, to form the little cross in the fabric, the thread must be conducted by means of a second stitch, under the single horizontal thread, outwards, to the next-diagonal thread.
In places where the net is worn, it can be strengthened in the same manner, the stitches being made the way of the stuff.
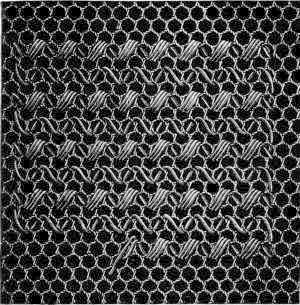
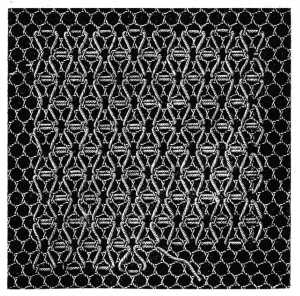
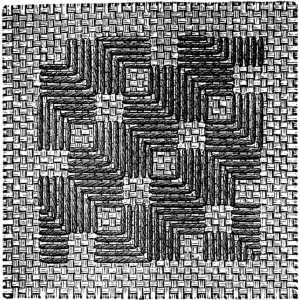
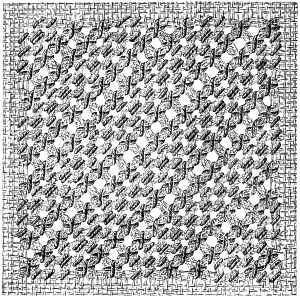
Damask stitches.—As a rule the pattern is simply outlined with stem and cord stitch, and the inside spaces are left plain. In spite of the time this simple tracing takes to do, the effect is rather poor and scanty. If however, the inside of the leaves and flowers, be filled in with damask stitch, the result is very handsome.
Not only can the following stitches, which are suitable for any linen coarse or fine, be used for this kind of embroidery, but most of the net and lace patterns too, and these combined with buttonholing and flat stitch produce charming effects.
Materials suitable for damask stitches.—All the threads and cottons used for net work can also be used for damask stitches, according to the material and the kind of work. We will enumerate them once more: Coton à tricoter D.M.C Nos. 8 to 20, Coton à repriser D.M.C Nos. 25 to 70, Coton à broder D.M.C Nos. 16 to 50, Fil à dentelle D.M.C Nos. 25 to 50, Coton à broder surfin D.M.C Nos. 100, 120, 150.[A]
This kind of embroidery is generally done with a very coarse needle, to press the threads of the stuff closely together and make the light spaces between, which appear in many of the following illustrations.
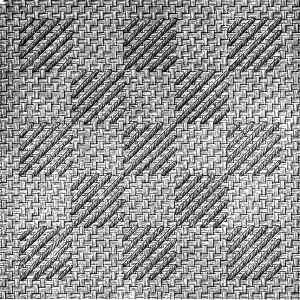
First pattern (fig. 142).—Carry the needle in a slanting direction over three threads and bring it out, from right to left, under three perpendicular ones, then again slanting, over three threads, from left to right, and out again underneath three horizontal ones, downwards from above. Thus the first stitch lies across, from right to left, the second, lengthways. On the wrong side, the stitch forms a regular succession of steps.
Second pattern (fig. 143).—This is worked exactly in the same manner as fig. 142, only that the second row of stitches touches the first, so that two threads enter and issue from the same hole.
Third pattern (fig. 144).—Though at first sight, this stitch is very like the Holbein or stroke stitch, it is very different in the execution. It is worked in two rows, to and fro; in the first, you make all the vertical stitches side by side in the width of the stuff, drawing your thread very tightly, in the second, coming back, you make the horizontal stitches in a straight line, at right angles to the first stitches. On the wrong side the stitches are crossed; they in thin stuffs, show through, and quite alter the appearance of the right side.
Fourth, pattern (fig. 145).—In the first row, the thread is carried slanting upwards from right to left, over two threads, then downwards under two. Coming back, the stitches must be set the opposite way, so that four threads meet in one hole.
Fifth pattern (fig. 146).—This is worked like fig. 145, only that the stitches must cover three threads each way. In the second row, you take up one thread on the right and two on the left, to form your stitches.
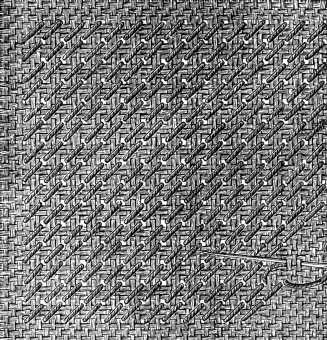
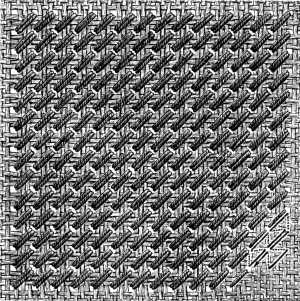
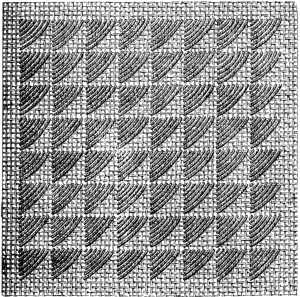
Sixth pattern (fig. 147).—Here, the stitches form a chess-board pattern. You begin with a diagonal stitch over two threads and bring your needle up again into the same line it started from. The second stitch covers three threads, the third six, the fourth eight; the next three decrease, successively in length, in the same proportion.
Seventh pattern (fig. 148).—Two kinds of cotton have to be used for this pattern, one of them soft and flat, like Colon à repriser D.M.C[A] (darning cotton) or Coton à tricoter D.M.C (knitting cotton)[A] for the flat stitches, and the other strongly twisted, like Cordonnet 6 fils D.M.C No. 8, 10, 12 or 15,[A] for the cross stitches.
The five flat stitches cover three threads in width and six in height, and lie from right to left and from left to right. In the second row, which must be two threads distant from the first, the stitches must lie in the contrary direction. In the lozenge-shaped space between, make four cross stitches, over four threads in height and two in width.
Eighth pattern (figs. 149 and 150).—Make five stitches over 8 horizontal threads, miss 6 threads and make another 5 stitches. The groups of long stitches above and beneath the first row, encroach over two threads of the first group, so that a space of only four threads remains between two groups. The stitch between these groups is generally known as the rococo stitch.
Bring out your needle between the third and fourth of these threads, and insert it again above, drawing it out afterwards between the second and third horizontal thread, and securing the first stitch with a back stitch. Make the three remaining stitches, as explained in fig. 150.
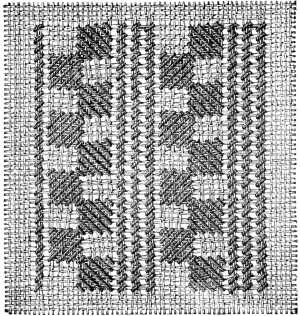
Ninth pattern (fig. 151).—This consists of straight bands of flat stitches, covering three threads each way, with spaces 8 threads wide between, ornamented with a small pattern in stroke stitch, (see chapter on Tapestry and Linen embroidery).
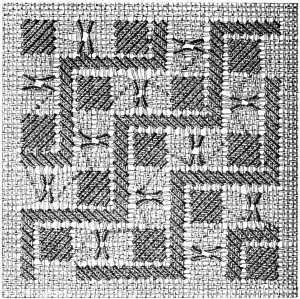
Damask stitch for figs. 103 and 105 (fig. 152).—The stitches, here represented on a large scale, form the border to the square in cut open-work in fig. 105. The long diagonal stitches, on either side, can be made to look fuller and more distinct, by using a soft, coarse cotton.
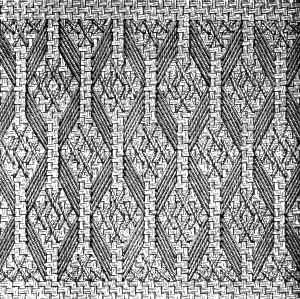
Tenth and eleventh patterns (figs. 153 and 154).—The former of these is used for filling in the short stripe in fig. 105, the second for the long inside one. Fig. 153 is clear enough to need no explanation; with reference to fig. 154, it is however as well to point out that the shortest stitch should cover 4 threads and the longest 12, the rest is easily learnt from the illustration. This is a very suitable design for the decoration of large surfaces and combines well with any running diagonal pattern, when it can be made to form a large star which can be worked as a separate figure.
Twelfth pattern (fig. 155).—In cases where this and the following stitches are to be executed on a light, transparent stuff, it is best to use a very strongly twisted thread, such as Fil d'Alsace D.M.C[A] or, Fil à dentelle D.M.C[A] instead of a softer and looser material. A stiff thread compresses the threads of the stuff better and the open spaces, thus made in it, are rendered more visible.
Count 6 threads vertically, put in the needle and draw it through from right to left, underneath 3 diagonal threads. For the next stitch, carry it upwards over 6 threads, and back under 3. The second row is worked back over the first in the same way. Leave 6 threads between each row.
Thirteenth pattern (fig. 156).—Carry the thread, from right to left over four vertical threads, and under the same number of horizontal ones. The second row of stitches touches the first, so that the thread it is worked with seems to be drawn through under the same threads of the stuff, as the one the first row was worked with.
Fourteenth pattern (fig. 157).—Here, the stitches, contrary to those in fig. 147, are set vertically. The first stitch covers 2 threads, the second 6, the third 10, the fourth 14, the fifth 18. The longest stitches of two checks always meet in the same hole.
Fifteenth pattern (fig. 158).—Cover the whole expanse with rows of stitches, such as are described in fig. 155, with intervals of 12 threads between them.
These rows are intersected by others, to which the thread is passed, from between the sixth and seventh of the 12 threads between the first rows. Where the stitches of the two rows meet, the working thread of the second row must be drawn through, under that of the first.
Sixteenth pattern (fig. 159).—Between every two rows of cross-stitch, leave an interval of 6 threads, counting those on each side of the rows. Over these 6 threads work 2 rows, as shown in fig. 148, but so, that in the second, the lower stitch of the first row and the upper one of the second, cover the same threads.
Seventeenth pattern (fig. 160).—This consists of stripes, 4 stitches wide, like those of fig. 155, with 3 threads between, which are overcast in the ordinary manner.
Eighteenth pattern (fig. 161).—Small squares of 7 stitches, inclined alternately, to the right and left, and so formed, that the longest stitch of one square is crossed by the first short stitch of the next, so that a space only 6 threads wide and 4 long, remains uncovered. The intervening stripes are filled with 3 rows of overcasting stitches, covering 2 threads each way.
Nineteenth pattern (fig. 162).—The steps formed by this pattern are 11 stitches high, and 11 wide, and each stitch covers 4 threads.
Eight threads intervene between each row of steps, which are covered at the bend, by a square of stitches, from the last of which, the thread is carried on at once, to the four single stitches.
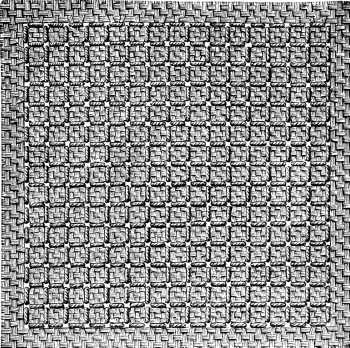
Twentieth pattern (fig. 163).—The 4 squares set opposite to each other, with 2 threads between, are edged all round by 3 rows of overcasting.
Twenty-first pattern (fig. 164).—Begin by rows of stitches, like those described in fig. 155, over 4 and 2 threads, with 4 threads between, not counting those covered with cross-stitch. Between the two rows of cross-stitch, join 6 threads together by a back-stitch, and carry your thread over the two last of the 6, to the 2 first of the next cluster. The narrow diagonal stripes are separated by 24 threads, exclusive of those covered by the cross-stitches. These spaces are filled in with squares, 10 threads wide and 10 long, formed by back-stitches crossed on the wrong side.
Twenty-second pattern (fig. 165).—In the closer stuffs, of a coarse texture, the threads of which do not admit of being drawn together, as you can those, of a loose thin stuff, where, by simply pulling your thread a little tighter you get open spaces, you must begin by cutting out every fourth or fifth thread. After which, you overcast all the rows, first one way, and then the other, with stitches covering 4 threads, each way. On this foundation with strong, loosely-twisted cotton, Coton à broder D.M.C or Coton à tricoter D.M.C No. 25, 30, 35, or 40, make long stitches, as indicated in the illustration.
Twenty-third pattern (fig. 166.)—From the point where the thread comes out of the stuff, make 16 stitches, four times over, all coming out of the same hole, over 8, 6, 4 and 6 threads, thus forming a star. Leave an interval of four threads between the stars, and unite the intervening threads by cross-stitches one way, and whip-stitches, the other.
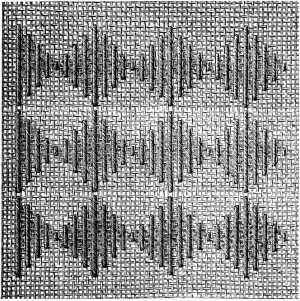
Twenty-fourth pattern (fig. 167).—Make a succession of diagonal stitches, increasing in length, and advancing one thread at a time, until the seventh stitch covers seven threads, and completes the triangle. Then begin a second triangle on the nearest, adjacent thread.
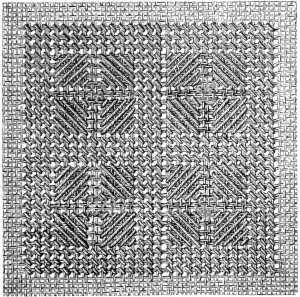
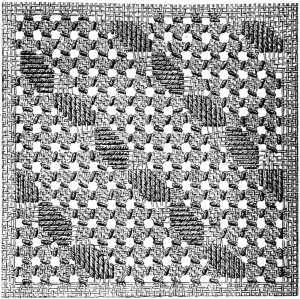
Twenty-fifth pattern (fig. 168).—Cover your whole surface with squares of 16 stitches, as in fig. 147, and fill in the intervening squares with 23 stitches, all radiating from one centre.
Twenty-sixth pattern (fig. 169).—Diagonal trellised stripes, made as indicated in fig. 165, and overcast, form the ground. Twelve threads are to be left between the stripes, upon which, work six-cornered, lozenge-shaped groups of stitches, set at right angles to each other, in diagonal rows.
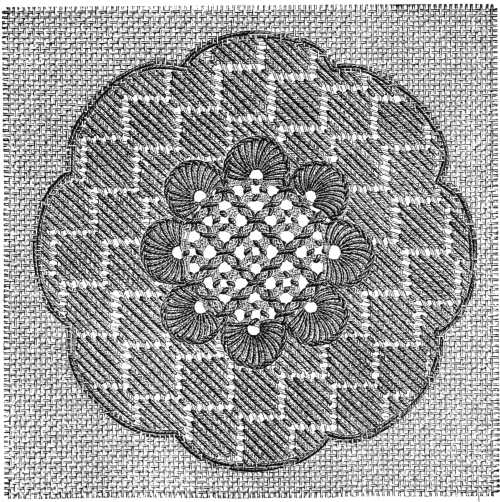
Twenty-seventh pattern (fig. 170).—We conclude our chapter with a circular design, which combines a variety of stitches, and introduces our workers to two new patterns, as well as to an advantageous way of hiding the junction of several kinds of stitches by semicircles of button-hole stitching.